
Barcode labels make billing faster and stock tracking accurate — scan at checkout instead of searching for items by hand. This tutorial shows you how to design a custom barcode label in KhataBuddy with your brand name, item name, MRP and code, save it as a reusable template, and print labels for any item in your inventory.
Prefer to watch? The full video walkthrough is above (available in English and Hindi). The written steps follow below.
Step 1: Open the barcode design section
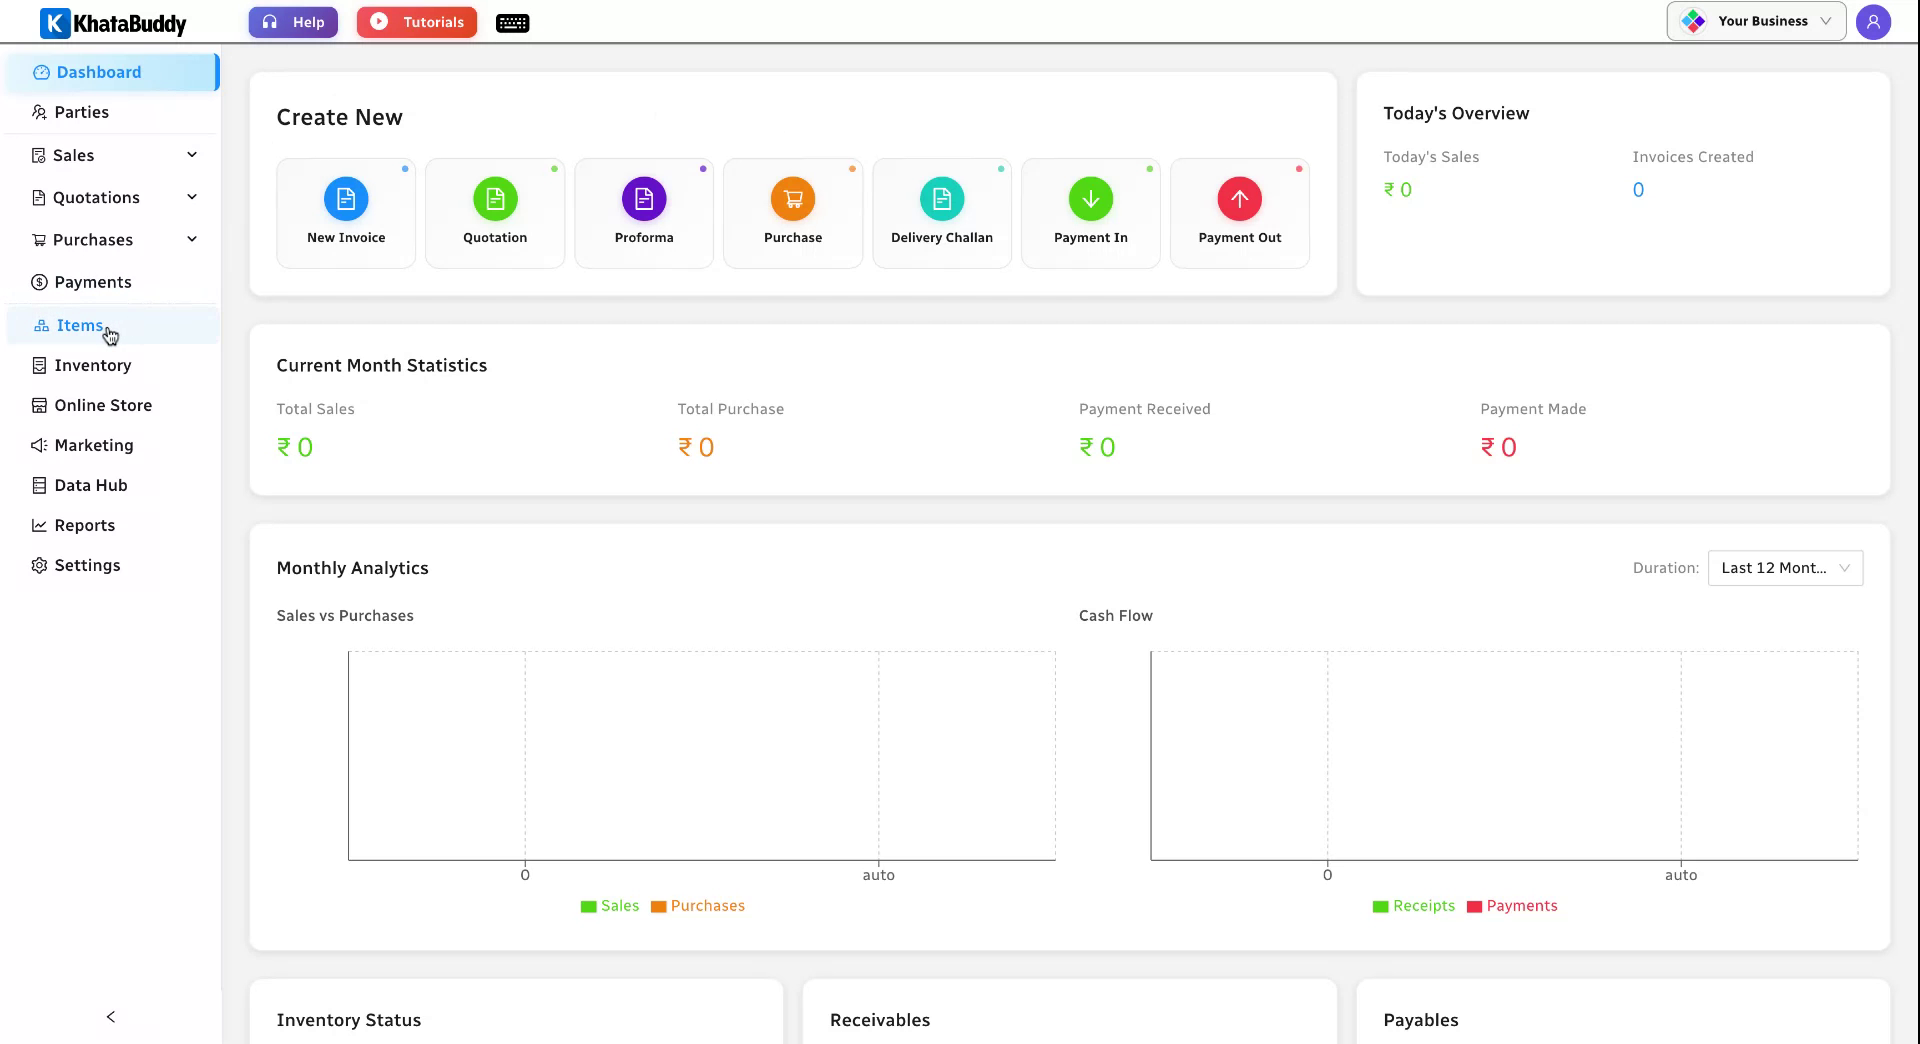
Go to the Items section and select Bar Codes to open the barcode design and printing screen.
Step 2: Choose the label size and layout
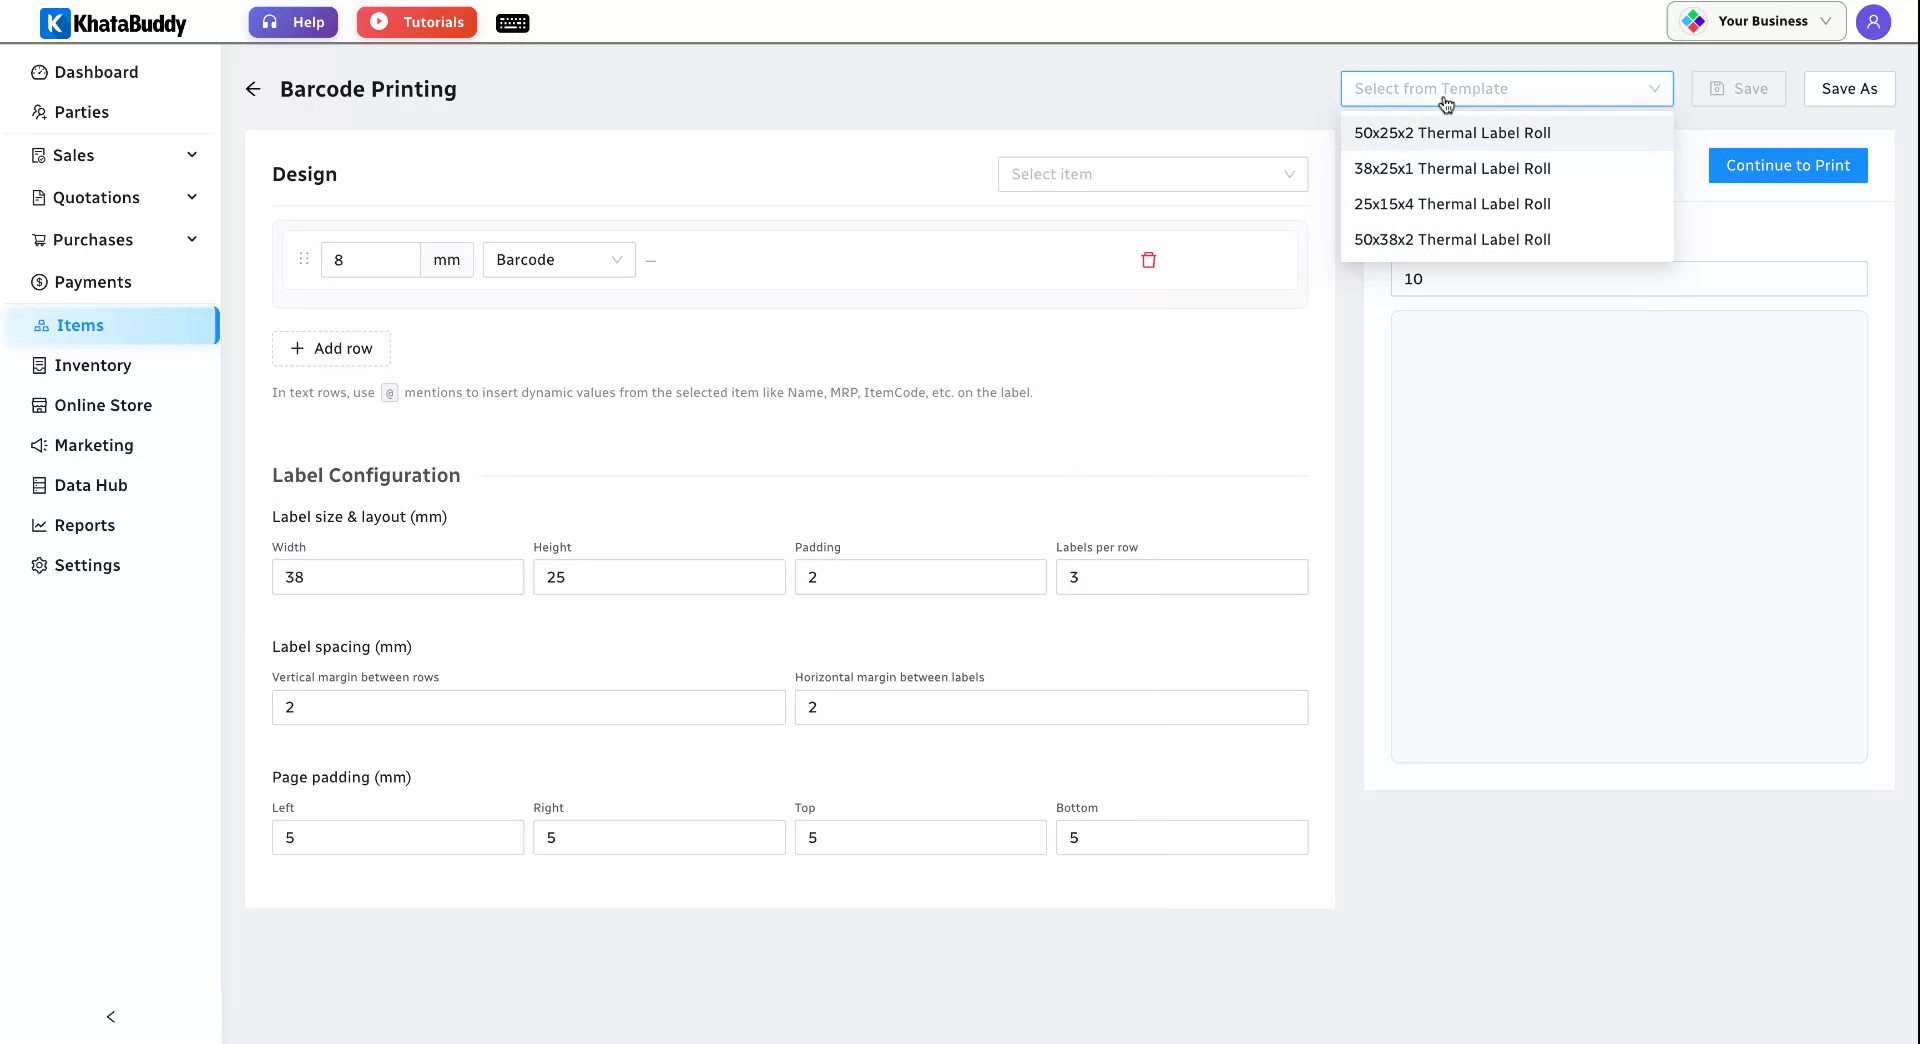
Set up your label configuration — label size, the margins between labels, and base padding. Instead of entering every value by hand, start from a standard template.
From the list of standard templates, select 50 x 25. This corresponds to a common thermal roll with two labels across, and it fills in the size and layout fields automatically. You can still fine-tune any value if your labels are different.
Step 3: Select the item to design for
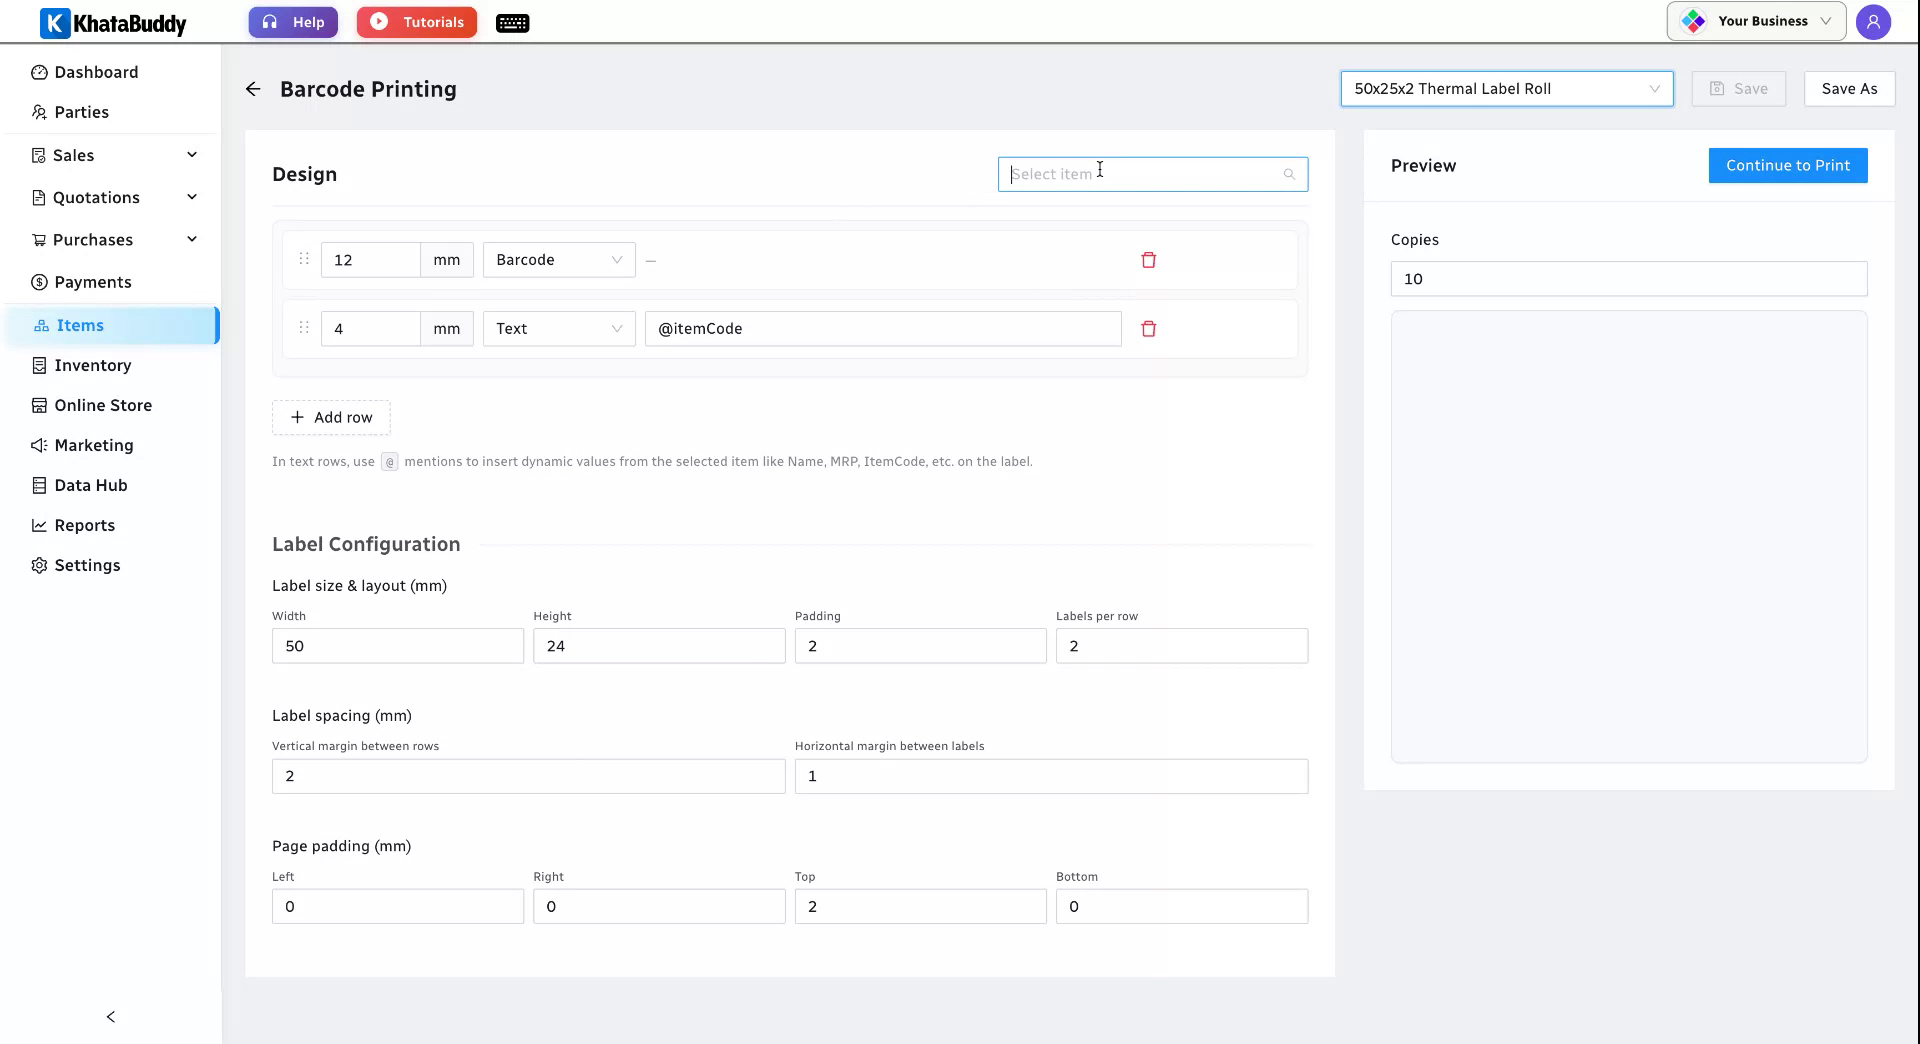
Move to the design area and first pick the item you want to design the label for — choose any product you’ve already added to KhataBuddy.
The design area is made of rows, and each row can hold a barcode or text. Text can be static (fixed, like your brand name), dynamic (pulled from the item, like MRP or name), or a mix of both.
Step 4: Add your brand name (static text)
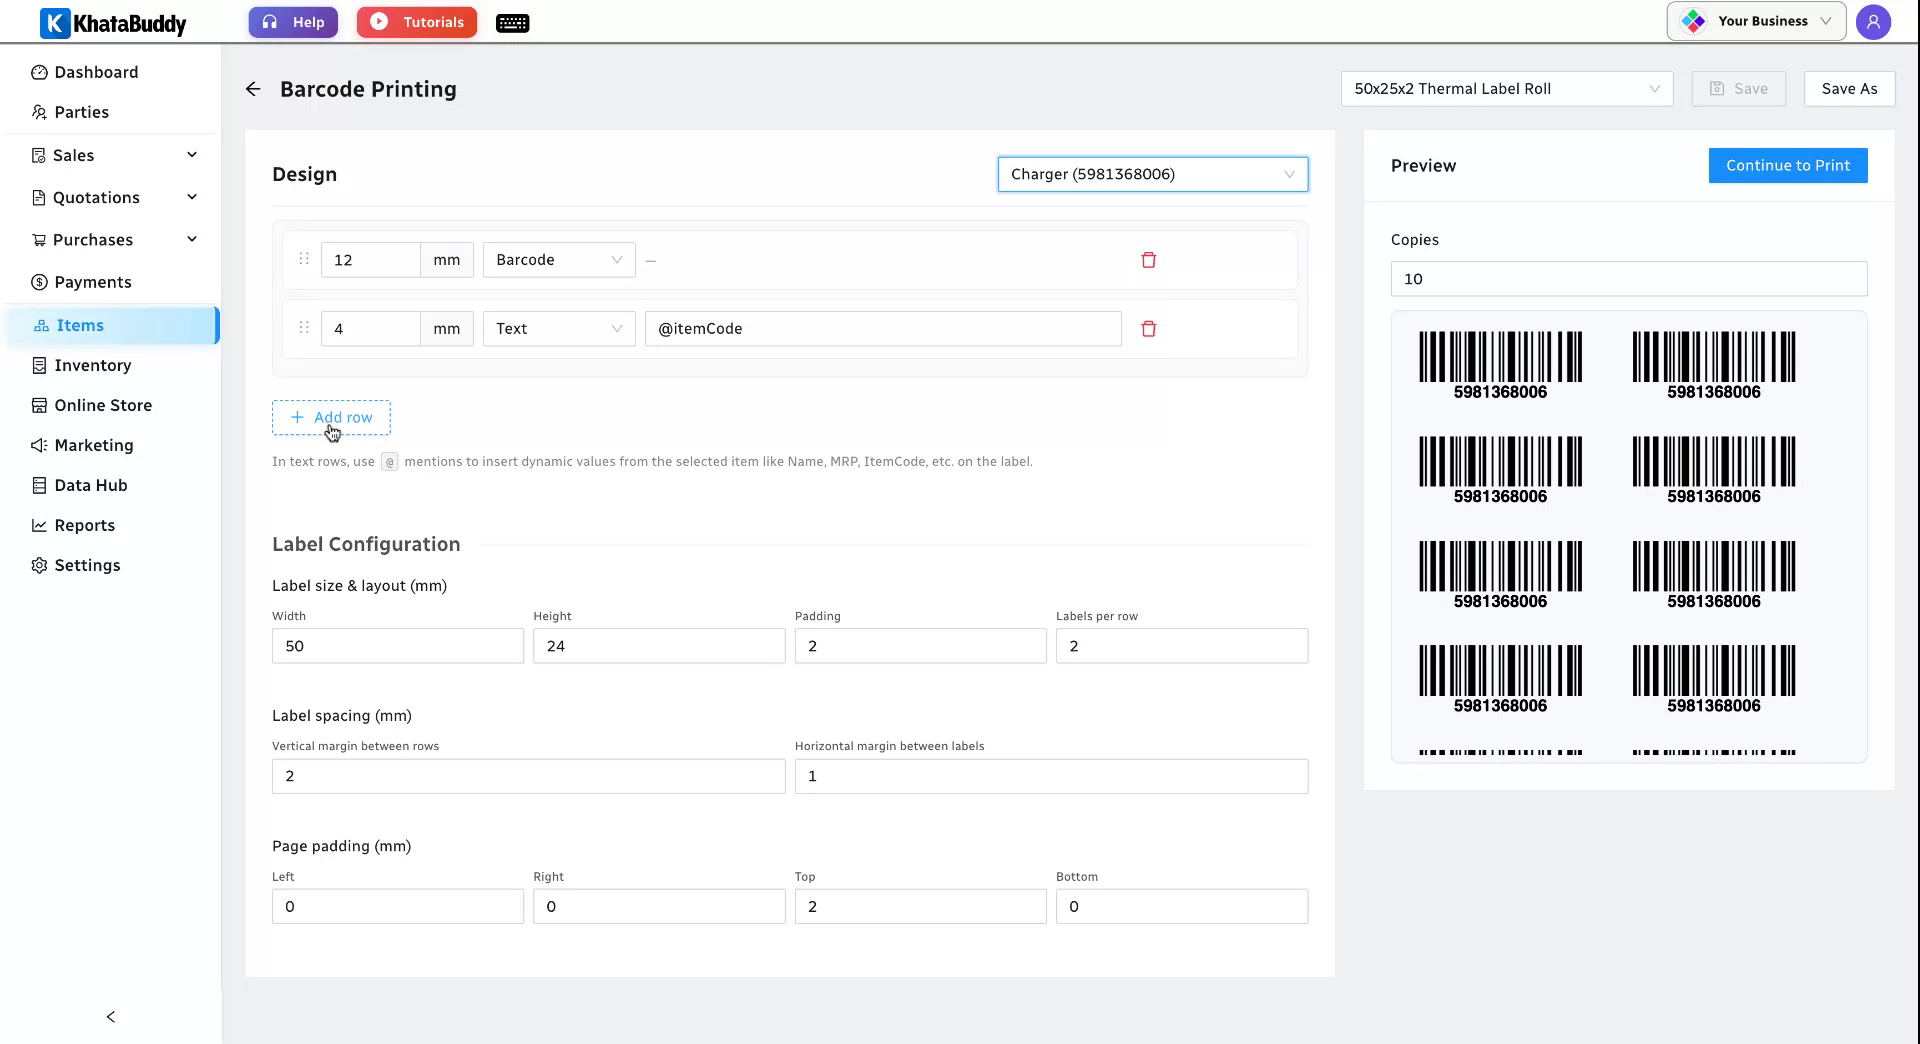
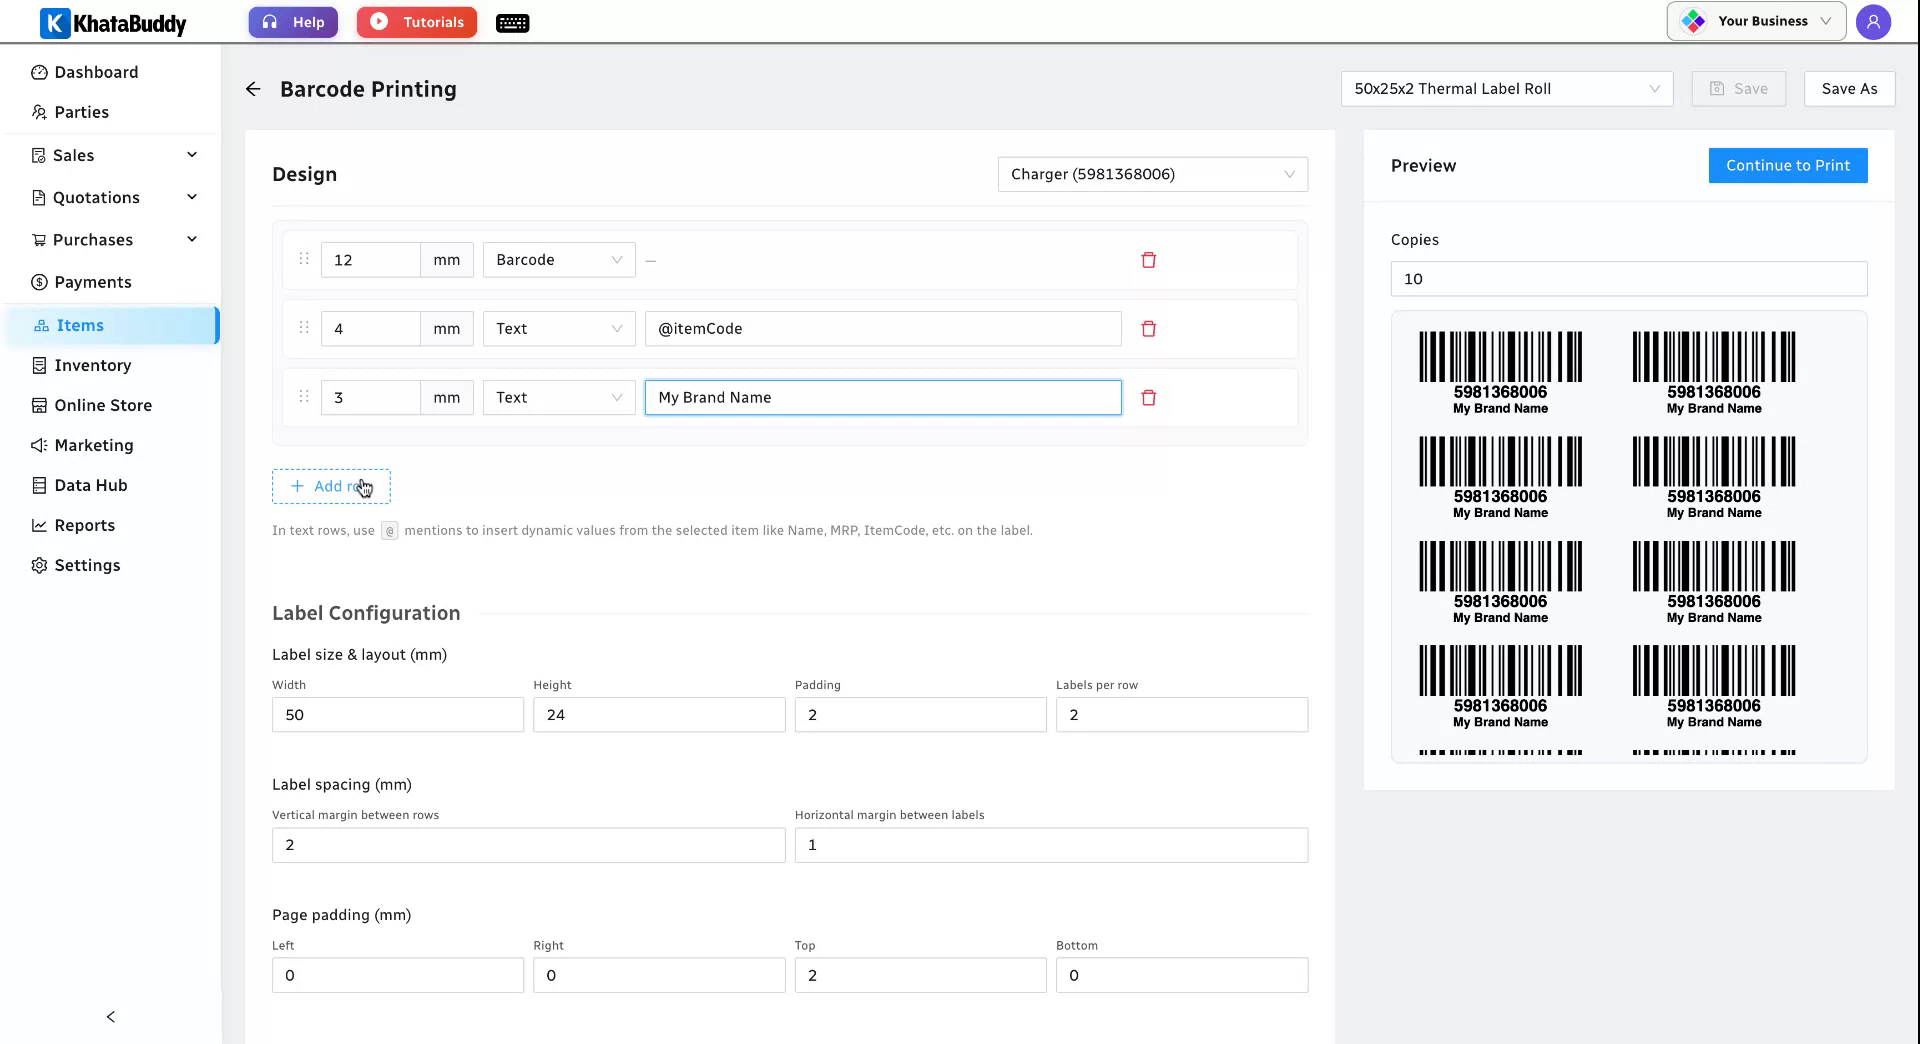
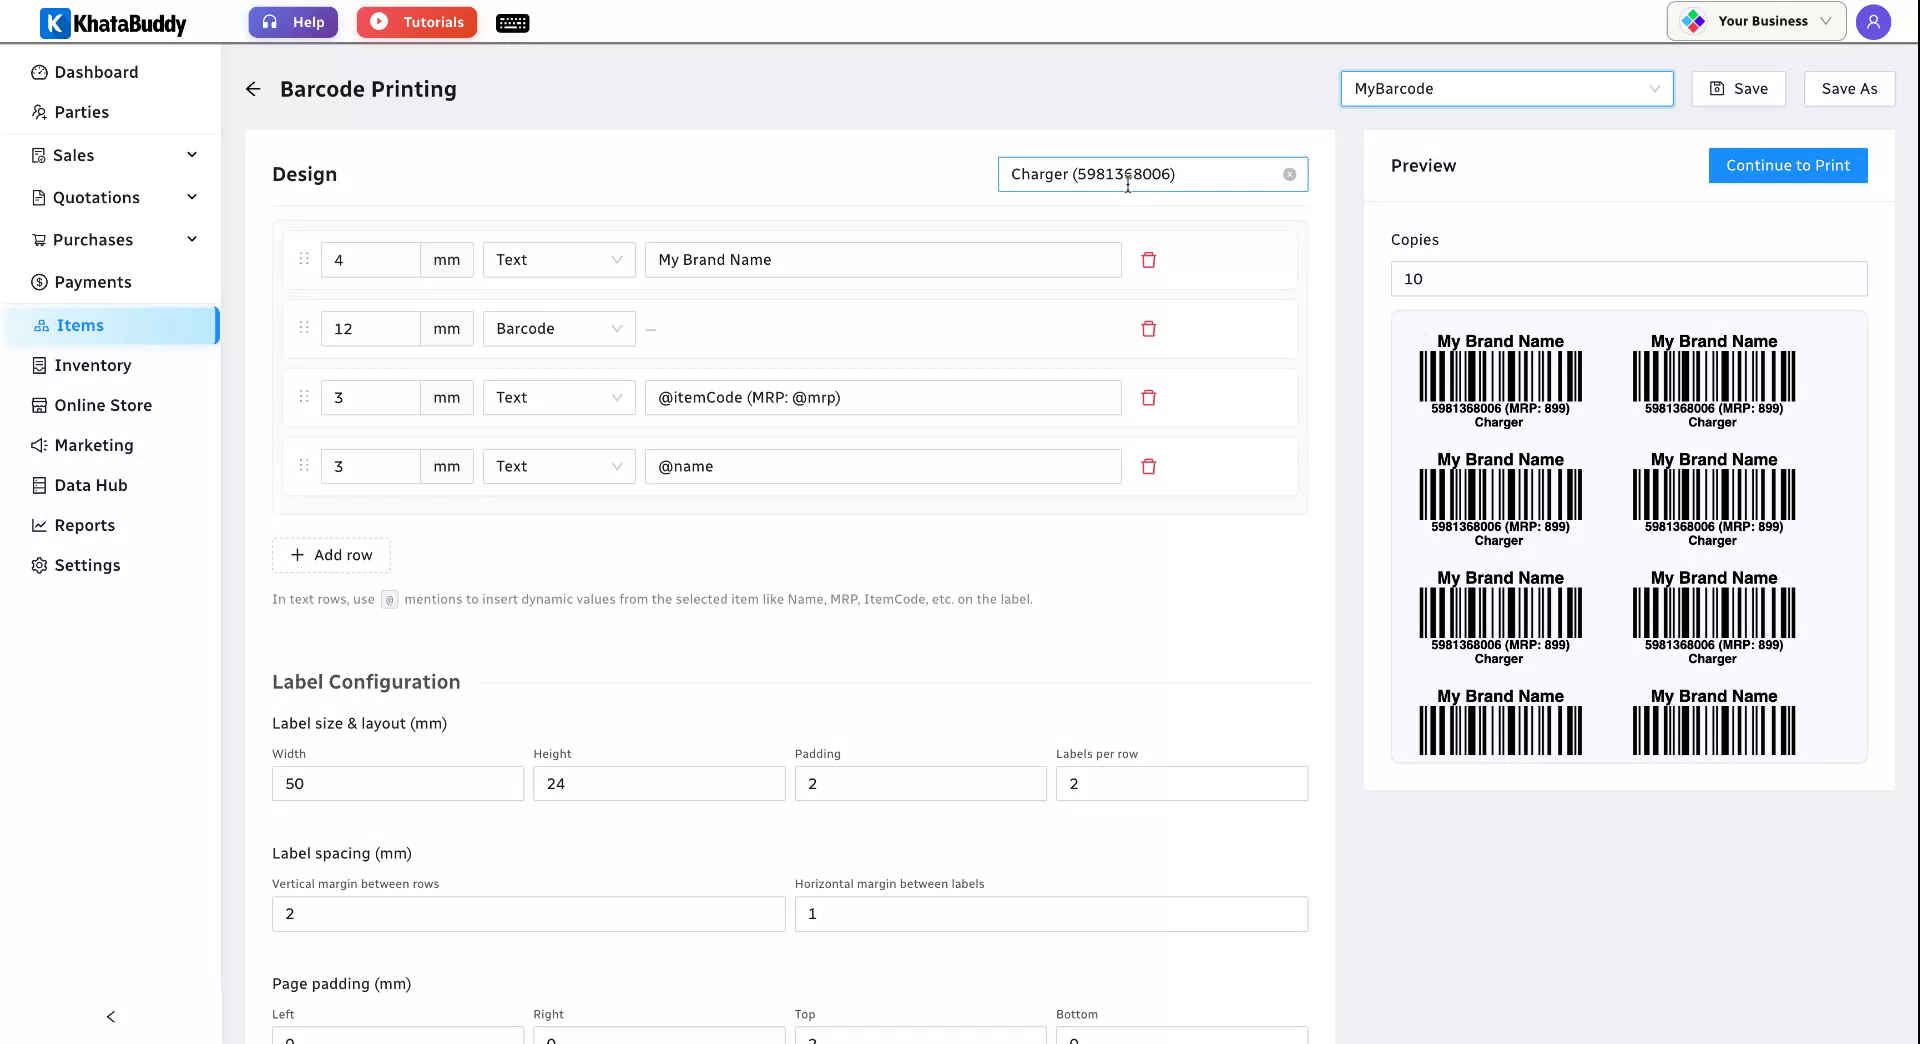
To print your shop or brand name on every label, add a new row, choose the text option, and type your brand name (for example, “My Brand Name”). Because it’s static text, it appears on every label no matter which item you select.
Step 5: Add dynamic fields like item name
To print information that changes with each item — like the item name — add or select a text row, then type the @ symbol. A dropdown of available fields (Name, MRP, Code, custom fields, and more) appears. Select Name, and the item’s name is placed on the label automatically for whichever item you choose.
Step 6: Combine static and dynamic text (Code, MRP)
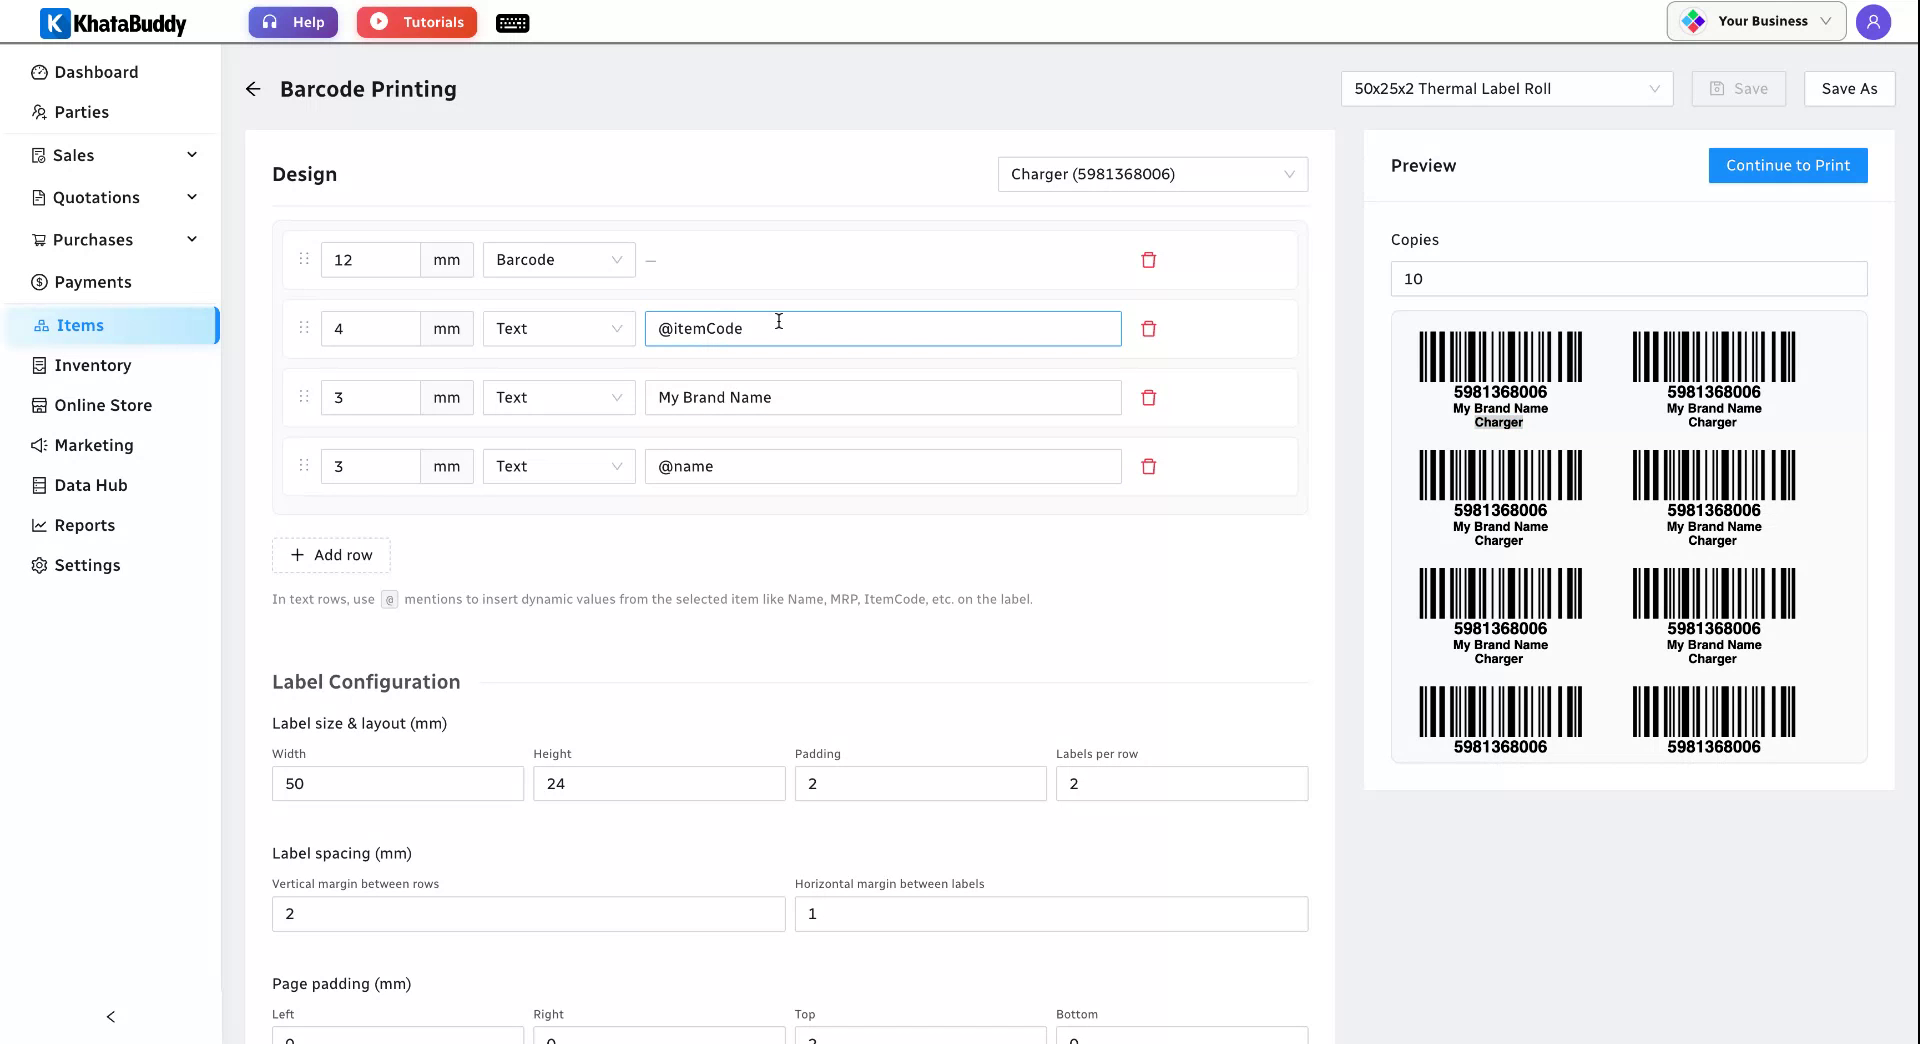
You can mix fixed and dynamic text in the same row — for example, a label like “Code: [Item Code] MRP: [MRP]”. In the row’s text field, type your static text ("Code: " or "MRP: "), then insert the matching dynamic field with the @ symbol.
Step 7: Adjust row sizes and order
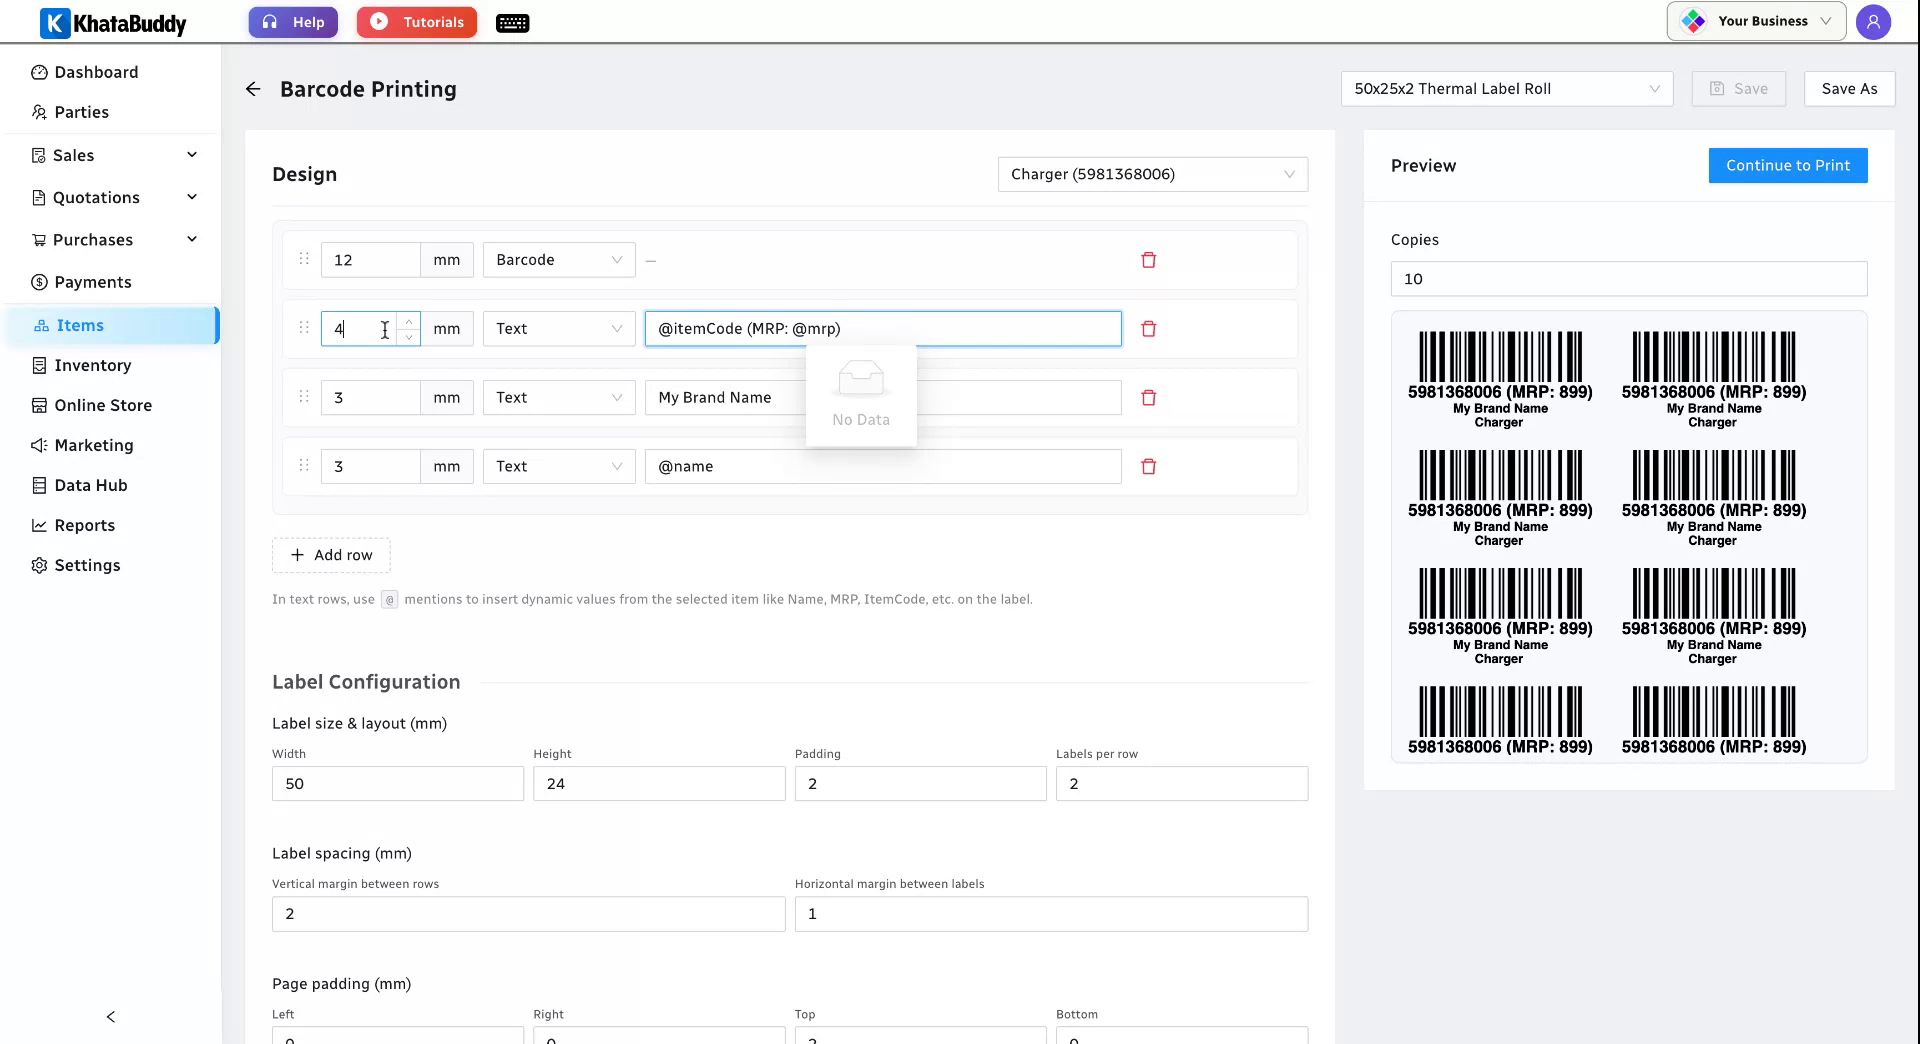
Emphasise the details that matter by changing each row’s size. Increase the size of the brand-name row to make it stand out, or reduce a row you want smaller. You can also drag rows up or down to reorder them — for example, move the brand name to the top.
Step 8: Save the design as a template
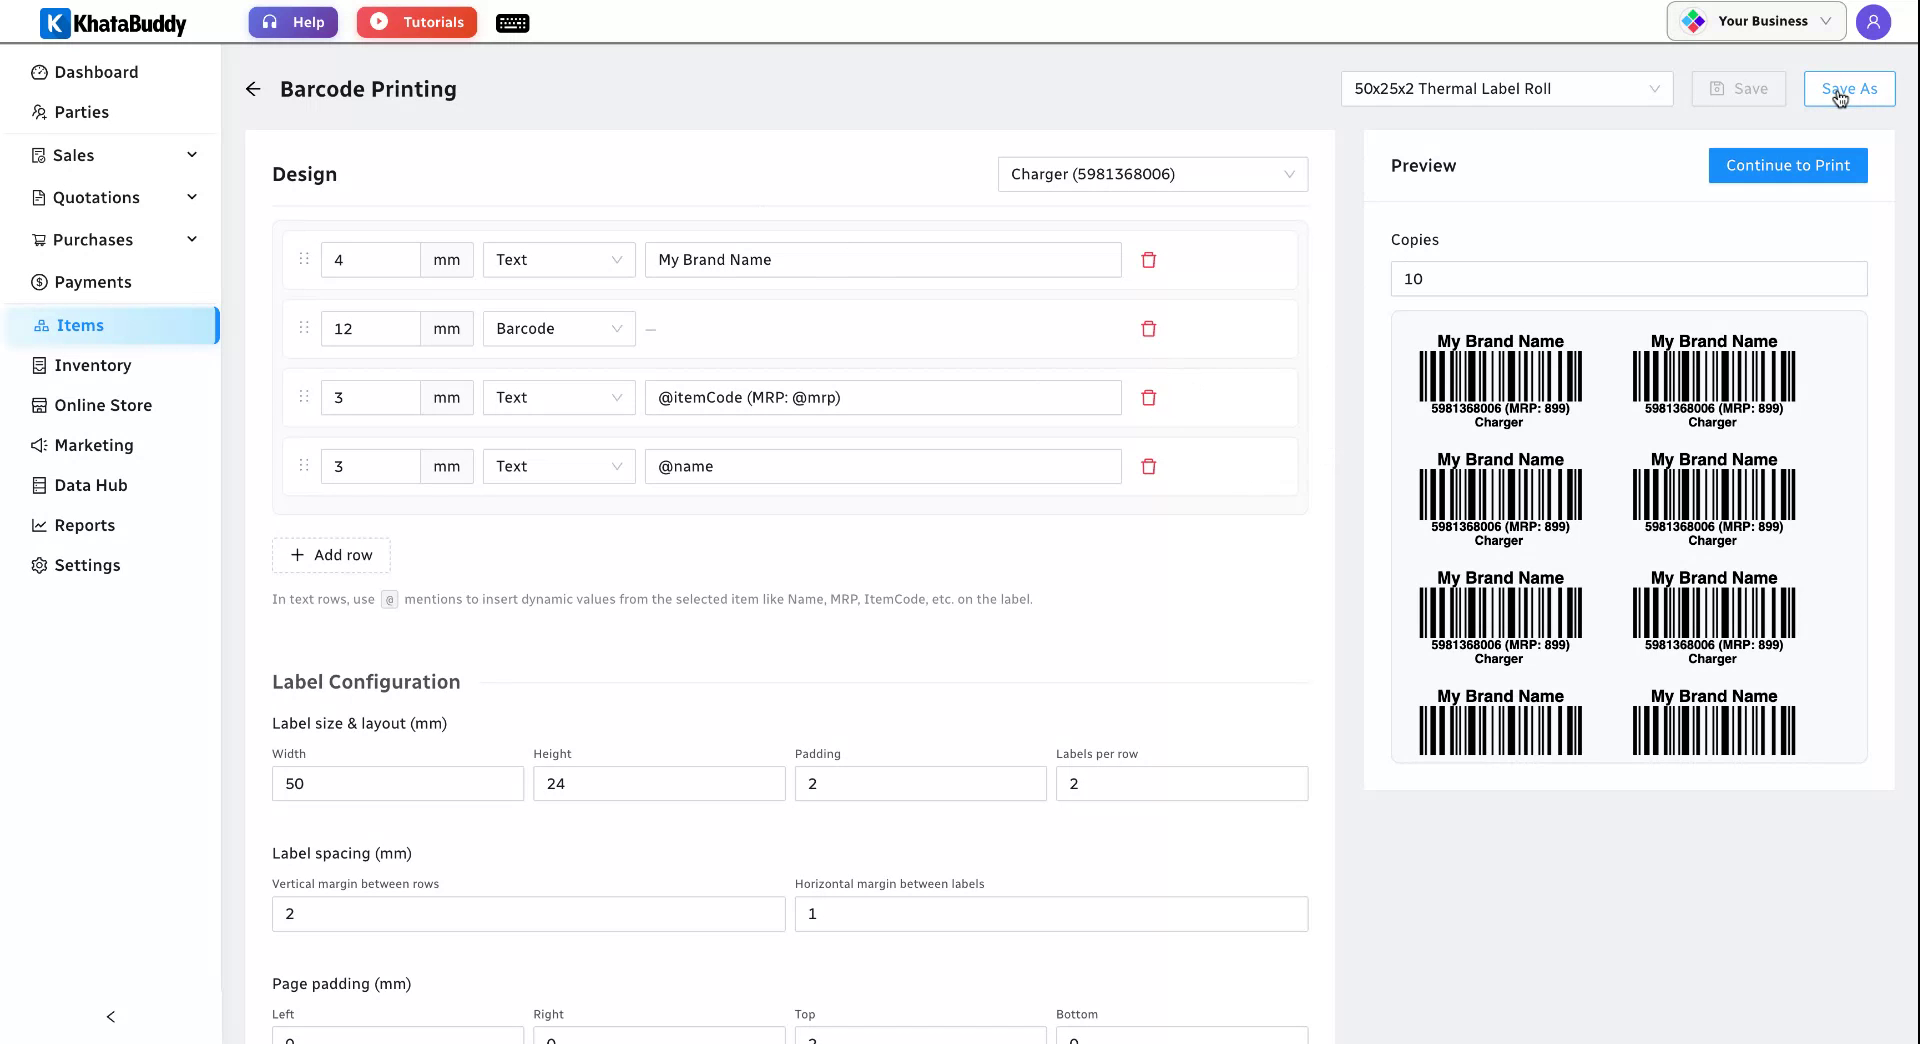
Once you’re happy with the layout, save it for future use. Click Save As, give the template a clear name, and confirm. Your design is now stored as a reusable template.
Step 9: Reuse the template later
Next time you need to print, you don’t have to design again. Open the Bar Code printing section and, in the template selector, choose the template you saved earlier.
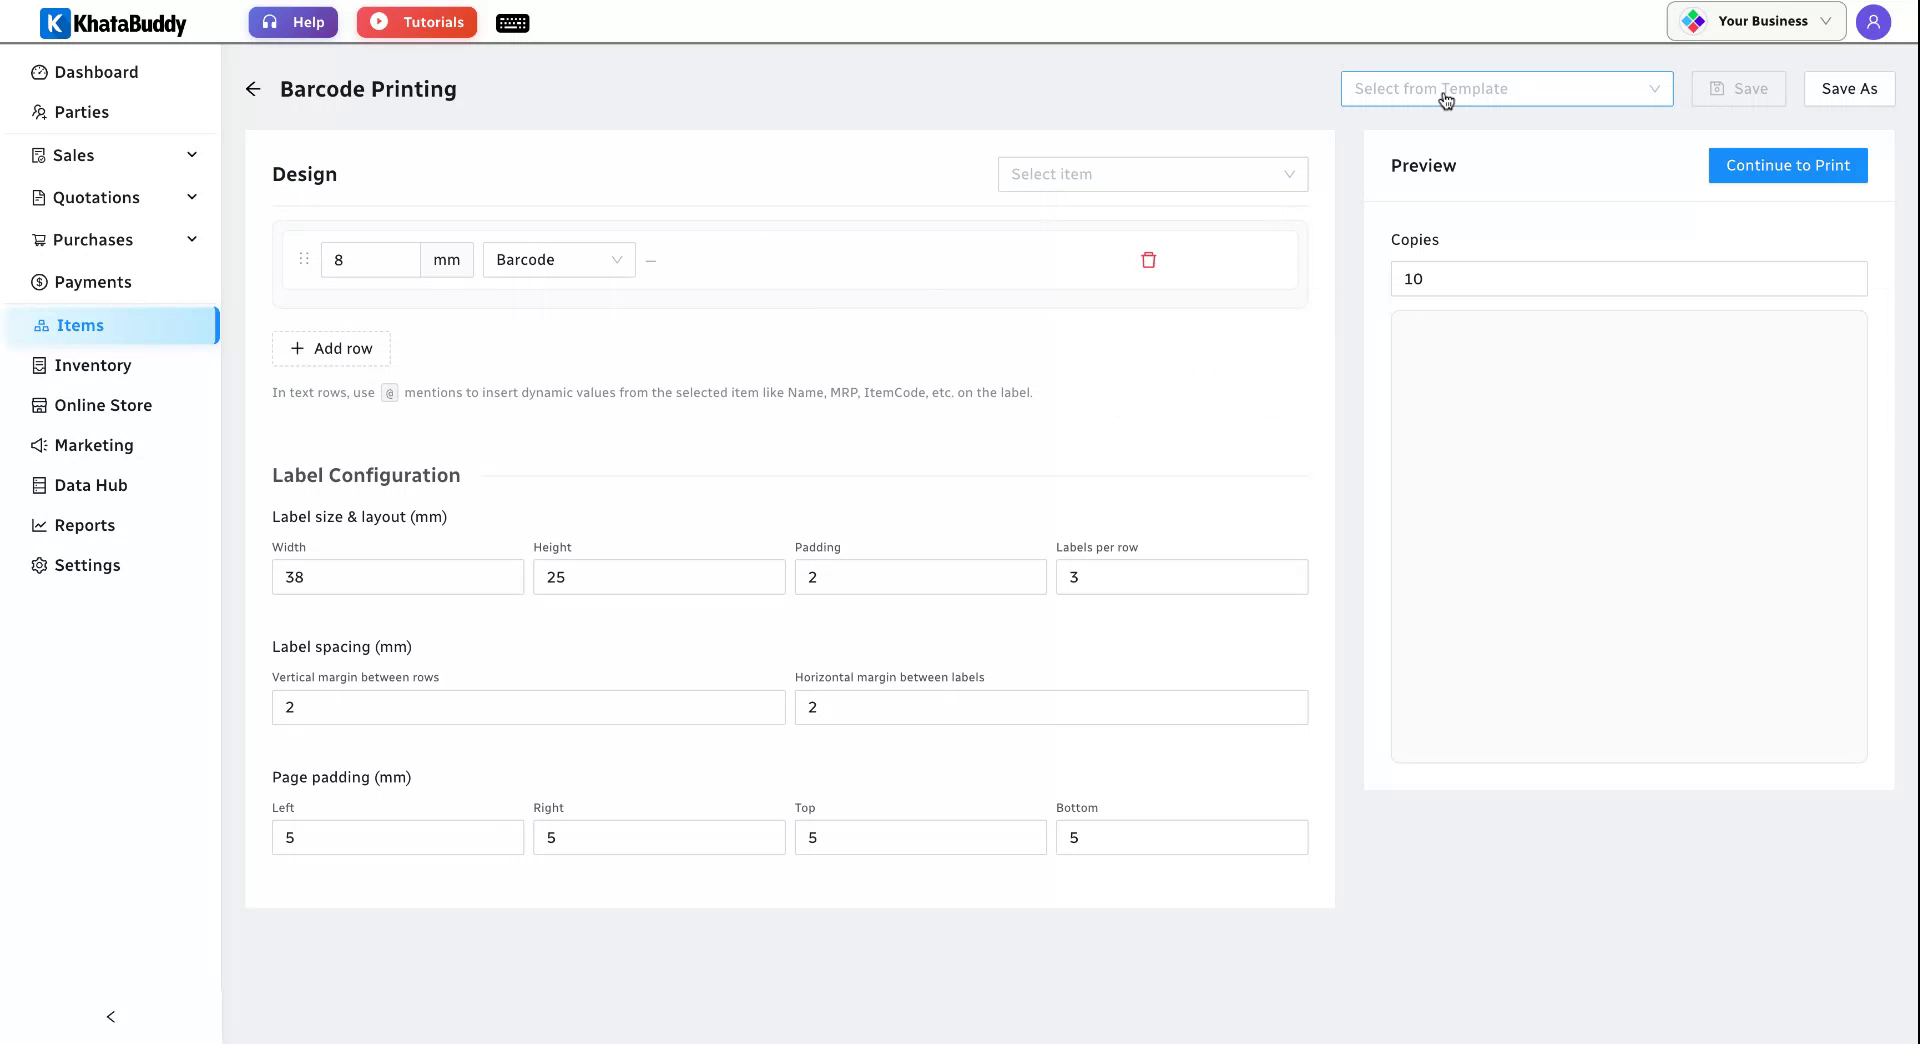
Step 10: Select the item, set copies, and print
With the template selected, pick the item you want labels for. You only change the item — all dynamic values (name, code, MRP, custom fields) update automatically. Set how many copies you need, then print and send the job to your printer.
That’s it — you can now design professional barcode labels and reuse the template for any item. Barcodes speed up POS billing and keep your inventory accurate. Try KhataBuddy free to set up barcodes for your shop.